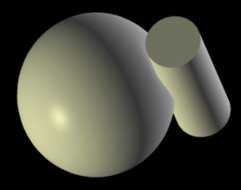
Exhibit C operands
Simple Boolean Subtraction (4)
|
|
Exhibit C, the imprint of a cylinder colliding a sphere, raises a new problem. Not only that the surfaces are curved, but also the contact contour isn’t even visible! (A mathematician would say he knows what it is, bend a circle over a cylinder…) You’ll see these are not real obstacles! (Download the project file - 12 KB) |
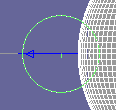
| Change to Side view. The cylinder disappears, because it’s not capped. Turn on Wireframe (Ctrl+W), now you can select the cylinder. Disable Y- axis and move the cylinder to left, like I did in the image on the right. Now you have the Boolean operands positioned for the subtraction! |  |
|
|
3. In the same way as we did above, zoom in with Arc Rotate (in Front view) and make a 600 x 450 antialiased render with the default gray background. Save the image as “front” (see on the left). Now hide the cylinder and make a new render in the same condition. Save the image as “sphere”, this will help you to make the transparency map for the sphere. From now on, you must not change the objects’ relative position! |
4. Open “front” in a paint editor. Select the exact boundaries of
the
black rectangle. Save the selection as “cylindermap”, the transparency
map
for the cylinder. Make some finishing touches with black brush at the
margins of
the image, not to remain any gray pixel!
| 5. Open “sphere” in the paint editor. Make a square selection of the white circle (the selection box has to be tangent to the circle). Make sure you can reproduce the selection coordinates, and then apply this selection to the other image, “front”. Save the selection obtained from “front” as a new image. Make a negative of this image! Paint white the entire image, excepting the central oval. Save the image as “spheremap” (see the image on the right). |
|
7. Make a new material, named “cylinder”. Leave the default settings and add “cylindermap” as transparency map. Hide the sphere. In front view (Edit mode) apply the “cylinder” material on the cylinder. Click Texture UV. Click the Select arrow. Change to Side view, Point Edit mode and cut the left half of the cylinder.
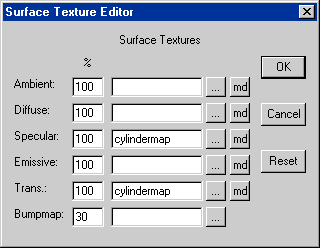
| 8. Do a test render. You’ll notice immediately the parasite specular reflection, very disturbing for the cylinder, but also recognizable on the transparent area of the sphere (bottom-left)! Disabling the specular components gets rid of the parasite reflection, but alters the shininess of the objects (bottom-middle). The solution is handy: edit the materials, adding the same map, used for transparency, to the specular component (see on the right). Now you are done, having a perfect render (bottom-right)! |  |
|
|
|
|