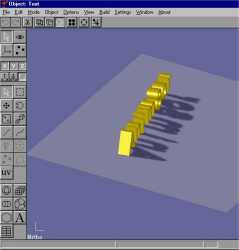
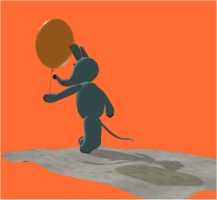
Simple Shadows
| Let's make shadows with Anim8or!
Why? Because shadows are funny, enhance the realism of the scene and can
be easily created with Anim8or. This tutorial explains how to do
simple shadows like those below, casted by objects illuminated by unidirectional
light, i.e. Anim8or's infinite light source. |
| We'll begin by doing some shadows, than
I'll explain (if necessary) why we did what we did. Most of the task is
made in Anim8or, but we need a paint program also. Any program is
good for the job, like the default paint program that comes with your Operating
System. What else do we need? An object that casts and a surface which
receives the shadow (pretty obvious, isn't it?). Let's get to work! |
1. Create an object to cast shadow
(If you already have an object, go to step 2)
Pick the Text tool and in Side view write
down "Anim8or". Click Build > Extrude... , than OK to accept
the defaults. The object has been created. |
2. Create a plane to receive the shadow
In the Front viewport create a Cube with X
and Y dimensions large enough to contain the shadow that will be created,
but not to exceed the margins of the viewport. For this tutorial double-click
the cube and make X/Y/Z around 100/100/50 and let the default for divisions.
Convert to mesh (Build > Convert to Mesh). Change to Top view and
in Point Edit mode box-select the upper points. Cut. Now we have got a
face of the original cube, visible in the Front viewport in Object Edit
mode. Select the plane and do Edit > Rotate > Rotate Custom... and
enter -90 for the X-axis. Position the plane with Edit > Locate > Stand
on Origin. |
3. Position the object
In the Top viewport the shadow will be created
along the X-axis, with the light source at the left. Orient the extruded
text accordingly (do it as you wish) and position it over the plane. I
placed it on the plane (Edit > Locate > Stand on Ground), slightly
rotated around Y-axis (see the image). |
 |
 |
4. Make a shadow color
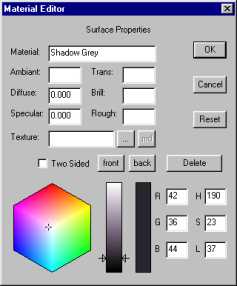
In the Material Editor make a new material
for the shadow. Real shadows are never black, so choose a dark grey with
a violet or brown tint. The shadow has to be absolute matte, so enter zero
for Diffuse and Specular. |
5. Create the shadow (it's
high time!)
Select the text object and apply the shadow
color. Right click the plane to add it to the selection and do Build
> Group. Now we are going to rotate the group according to the direction
of the light. Assuming that the light's direction makes an alpha angle
with the plane, we have to rotate it around Z axis with (alpha-90) angle.
For this tutorial let's admit the light falls under an angle of 30 degrees,
so rotate the group (Edit > Rotate > Rotate custom...) around the
Z axis with -60 degrees. Under Options > Debug deselect Show
Grid. Click away to deselect the group. What you see now in the Top
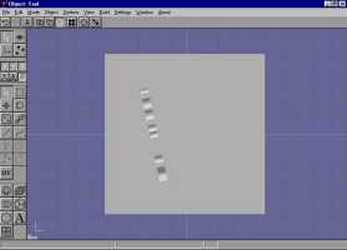
view is actually the shadow, only that it is compressed along the X-axis
(see the picture). |
 |
 |
6. Capture the shadow
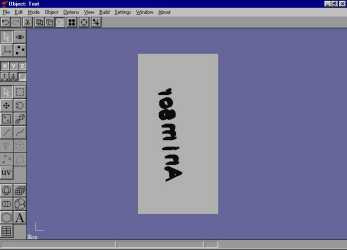
Capture the screen (hit Print Screen on the
keyboard or use a capture application). Load the captured image in an image
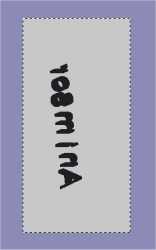
editor end select the exact boundaries of the shadow plane (see the picture).
Copy, than save the selection as new image in a format accepted by Anim8or
for
textures. At this point you may want to soften the edges of the shadow
or add a penumbra, but for the tutorial is good as it is. |
7. Apply the shadow on the
plane
Back to Anim8or, hit undo to undo the rotation,
undo ones more to ungroup and hit undo for the third time to undo the shadow-coloring
of the text. In the Material Editor create a new material by loading the
shadow-image file saved at step 6. Select the plane and apply the new material.
You may apply a color on the text and an amount of transparency to the
shadow-plane if you want, and that's all! Change to Ortho view to admire
your work (see the image). |
 |
A few words about creating the shadow
The shape of a shadow in infinite light
is the isometric projection of the contour of the shadow-casting object
(viewed in the direction of light) over the receiving surface. At step
5, when rotating the group with alpha-90 degrees, the Top view featured
the object's largest cross-section viewed in the direction of the light
(which actually obstructs the light) as a matte dark shape. That would
be the shape of the shadow in orthogonal projection, i.e. if the receiving
plane would be perpendicular on the direction of the light. Because our
plane is inclined, that "orthogonal shadow" has to be scaled with a factor
of 1/sin(alpha) along the X-axis. Anim8or does that for us! You have noticed
that the receiving plane appeared compressed along the X-axis with the
same scaling factor. At step 7, when mapping the image of the compressed
shadow-plane on the actual shadow-plane, the image of the shadow is stretched
with the exact amount to be mathematically correct.
Further remarks
-
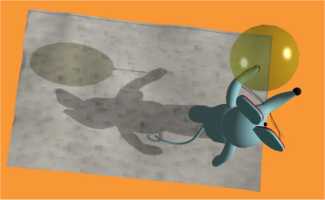
This simple method is applicable even if the
shadow falls over a bumpy surface, provided that planar mapping is satisfactory
(see the picture).

-
To be visible the texture under the shadow,
make the shadow-color transparent (at step 4), or make the shadow-plane
transparent (at step 7) and place it over the textured surface.
-
If your object has assigned different colors
to different faces, after re-coloring it at step 5, the undo maneuver doesn't
recover the colors. To avoid this problem, at step 5, just before applying
the shadow color to the object, do Edit > Copy and your precious
object is back-upped. Do the procedure as described above and at step 7,
after the third undo when the object appears with missing colors, just
cut it and do Edit > Paste. The initial object is pasted in the
proper place.
-
At step 6, if you process the shadow image
in the paint program, be careful not to affect that part of the contour
that will be overlapped by the object. A shadow may appear on the lightened
side!
-
The shadows created along the X-axis will
never fit the Object Editor's default lights. Render from the Scene Editor,
with properly oriented infinite light.

Have fun,
Laszlo
Korosi


